 Steps to create a Stand Out Effect in PowerPoint
Step 1- Select an Image
Select a high-resolution image that does not pixelate upon expanding. Add this image to the slide and fill the entire canvas with it.
 Step 2- Insert a Circle and Adjust its size
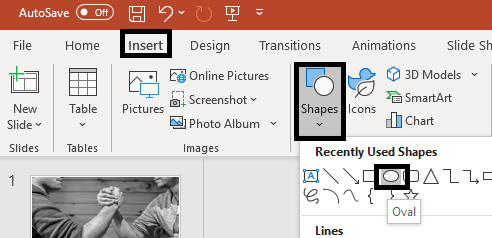
Next up is to insert a circular shape and place it around the area you want to highlight. For this follows these steps-
- Click on Insert> Shapes> Oval
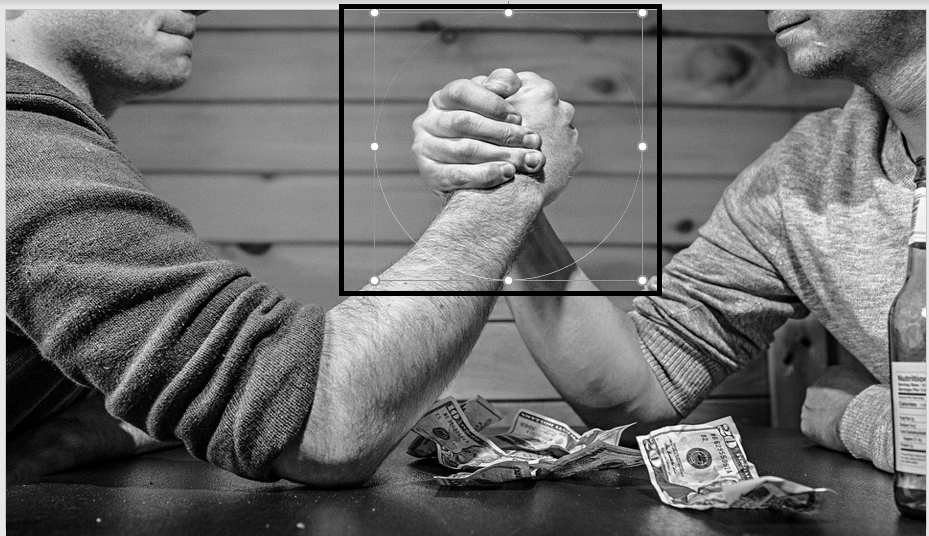
- Adjust the size of this circle and place it on the area
 Step 3- Fragment and Merge the Image and the Shape-
The next step is to merge the image and the circle together so that we can cut out the portion we want to highlight in the image. Here are the steps-
- Select the entire image on the slide
- Press CNTRL and click on the circle
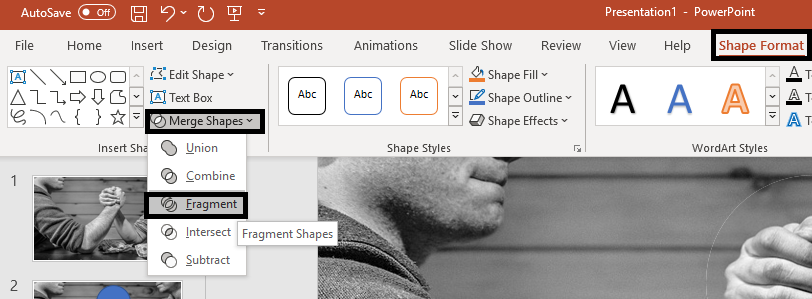
- Go to the Format tab and select Merge Shapes
- A dialog box with various options appear from which select Fragment
 Step 4- Blur the rest of the Image
The next step consists of blurring the rest of the image so that one can focus on the area that is to be highlighted. Follow these steps to create a blur out effect-
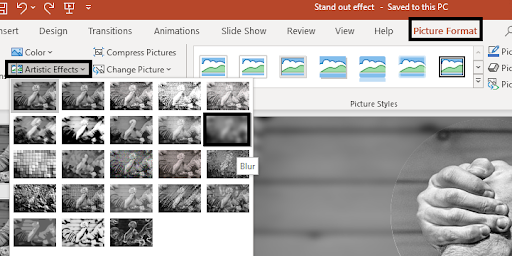
- Select the full-size image that you have not fragmented
- Go to Picture Format> Artistic Effects
- Select the Blur option from the dialog box
 Now the fragmented image is brought into the limelight while the rest of the image is blurred out, creating an awesome effect altogether ( see the image below).
 Step 5- Add a Transparent Layer
The next step involves adding a transparent layer to the slide which will help in intensifying the highlighted effect. It will also help in displaying any additional text that can be read with ease.
Here are the steps-
- Go to Insert> Shapes> Rectangle
- Cover the entire canvas with the rectangular shape
- Right click on the shape and select Format Shape
- The Format Shape dialog box will appear from which select Line> No Line
- Click on Fill> Solid Fill and select the black color. Increase the transparency to 25%
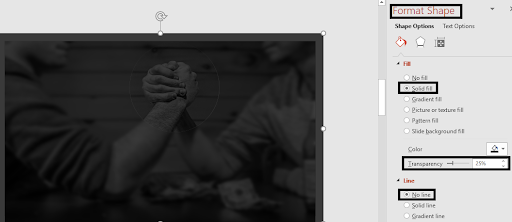 Now that a transparent layer is added, we have to send this layer backward and bring the fragmented image forward to create the effect we want. Here are the steps-
- Click on the transparent shape and select it
- Go to Shape Format> Selection Pane
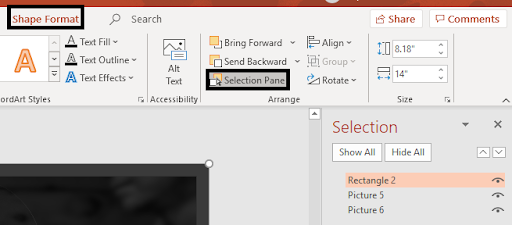
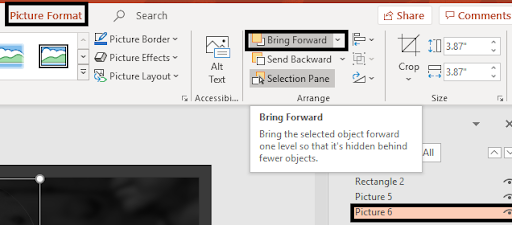
- Locate the fragmented image from the panel on the right (which is our case is Picture 6)
- Click on Picture Format. Select the Bring Forward command and keep clicking on it till you see the highlighted area upfront.
 This is how the highlighted area will look like:
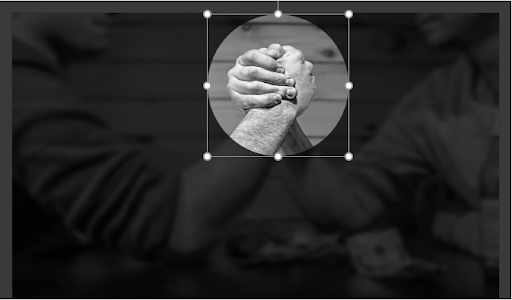 Step 6: Outline the highlighted area
The last step is to outline the highlighted area to further enhance the “stand out” effect. Here are the steps to do so:
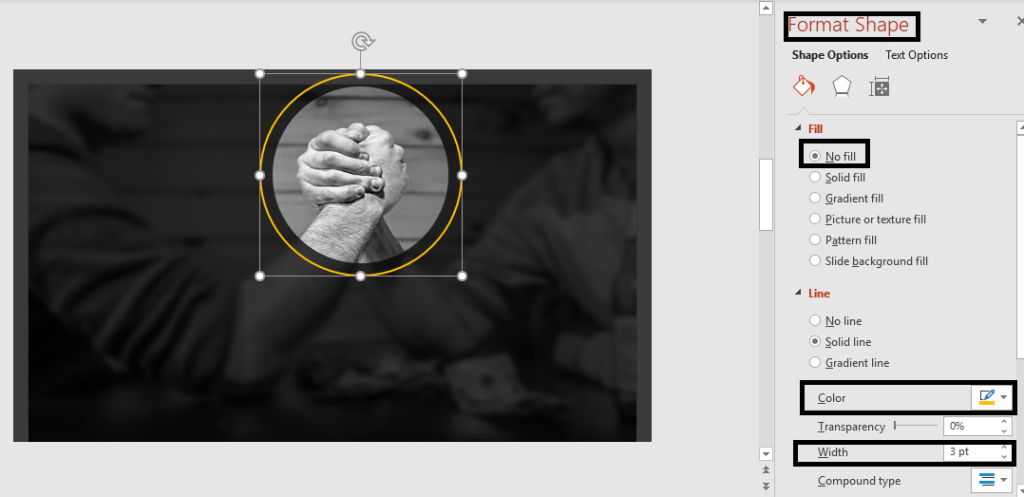
- Insert a circle by clicking on Insert> Shapes> Circle. Make sure that the circular shape is larger than the highlighted portion
- Right click on the shape and select Format Shape
- Select Line> Solid Line and choose a yellow or a golden color from the Color options
- Increase the width of the outline to make it more visible ( we have chosen 3pts)
 To evenly distribute the outline and the image:
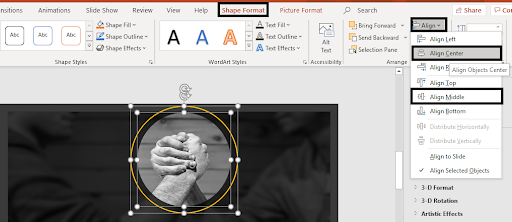
- Select both the options and click on the Shape Format tab.
- Go to Align and select Align Center and Align Middle
 Now add text boxes and your desired text.
This is how the final image will look like:
 Was this tutorial helpful? Let us know your thoughts in the comment section below!
 Home
Home 


 Customer Reviews


All these hacks to create professional slides are exceptional. Is it possible to have these in pdf format?