Using the right visuals can make a lot of difference to your presentation. In fact, they can transform an altogether boring presentation and turn it into an exciting one without putting too much of an effort. They also strike the right chord by acting as visual metaphors to explain the most complicated concepts in a simplified manner.
The magnifying glass icon is generally used as a symbolic representation of zoom or search. However, it can also be used to convey the most creative business ideas and to add an element of interest to the presentation. It also helps in highlighting some important concepts like financial loopholes, business growth, problem-solving, etc.
So, get creative today and learn three ways of designing an awe-inspiring magnifying glass icon imagery in PowerPoint itself!
What you will learn in this tutorial:
Steps to create a Magnifying Glass Icon:
Design #1
Step #1- Insert a Circle: Hollow Shape to your slide
The first step is to insert a donut shape to your slide. For this:
- Go to the Insert tab and click on Shapes
- A dialog box with many shape options appear
- Select Circle: Hollow from Basic Shapes
- Adjust the size of the circle and reduce its width using the adjustment handles (see the screenshot below)

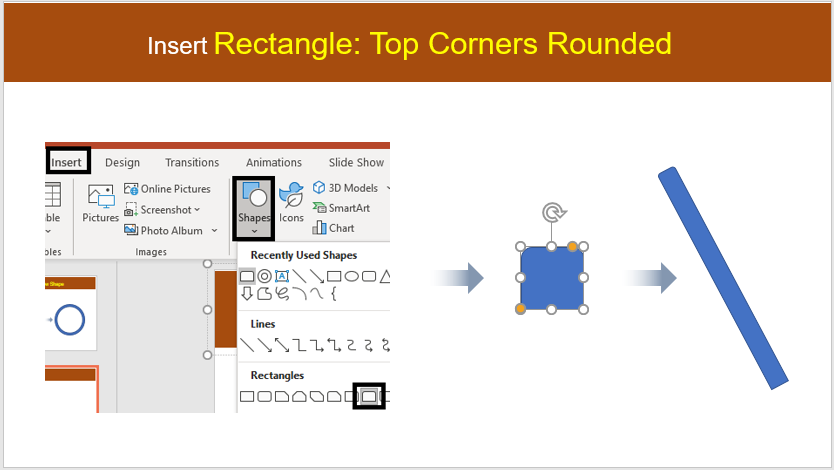
Step #2- Insert a Rectangle: Top Corners Rounded
The next step involves inserted a rectangular shape with rounded corners to create the handle of the magnifying glass. For this:
- Go to the Insert tab and click on Shapes
- A dialog box with many shape options appear from which select Rectangle: Top Corners Rounded
- Rotate it a bit using the rotation handle
- Adjust the shape and size of the shape as per your need
Step #3- Reposition the Shapes
Adjust the size of the shapes and reposition them in a way that they look like the basic structure of a magnifying glass (see the screenshot below)

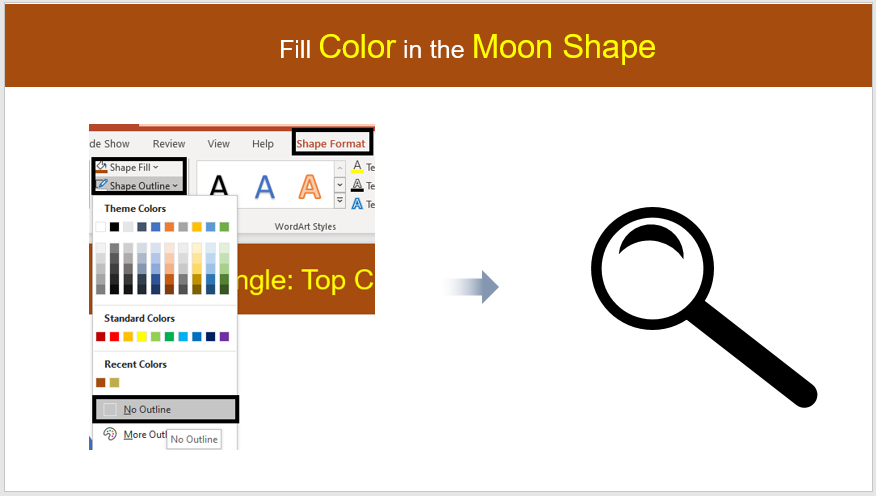
Step #4- Fill Color in the Shape
Now that the basic structure of the magnifying glass icon is ready, let us fill it with the color of our choice. To do this:
- Go to the Shape Format tab
- Go to Outline> No Outline
- Once that is done fill color by clicking on Shape Fill (see the screenshot below)
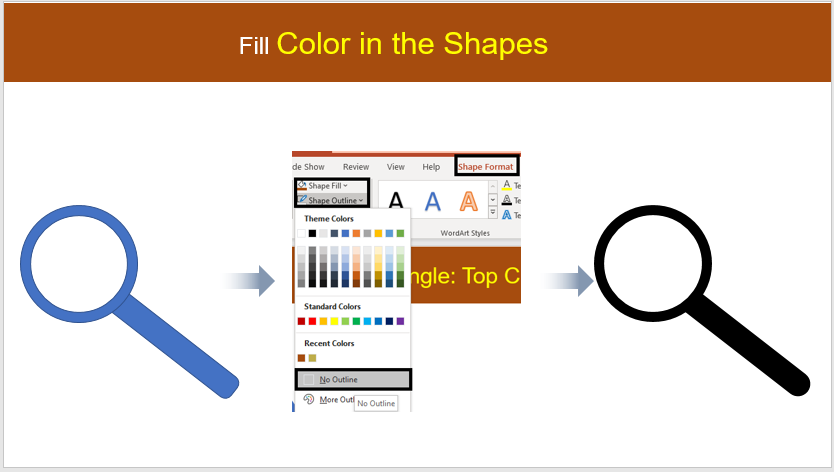
This is the basic design of a magnifying glass icon. To create its other two variations, follow these additional steps:
Design #2
Repeat all the four steps for this variation of the magnifying icon and insert a moon shape. For this:
- Go to Shapes> Basic Shapes> Moon
- Rotate and resize the shape of the moon by holding Alt + Right arrow key (see the screenshot below)
- Remove the outline by going to Shape Format> Outline> No Outline and then fill the shape with any color you like. For this click on the Shape Fill option and select any color of your choice from the dialog box. We have filled the shape with Black color
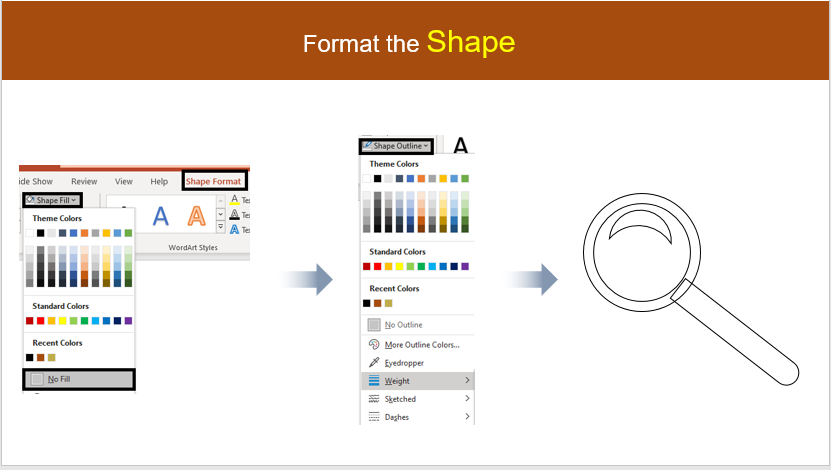
Repeat all the steps from 1 to 4 and then remove the outline to create the third variant of the magnifying glass. For this:
- Go to Shape Format and click on Shape Fill > No Fill
- Next, click on Shape Outline and increase the width (see the screenshot below)
- Merge both the shapes by clicking on Shape Format> Merge Shapes> Union
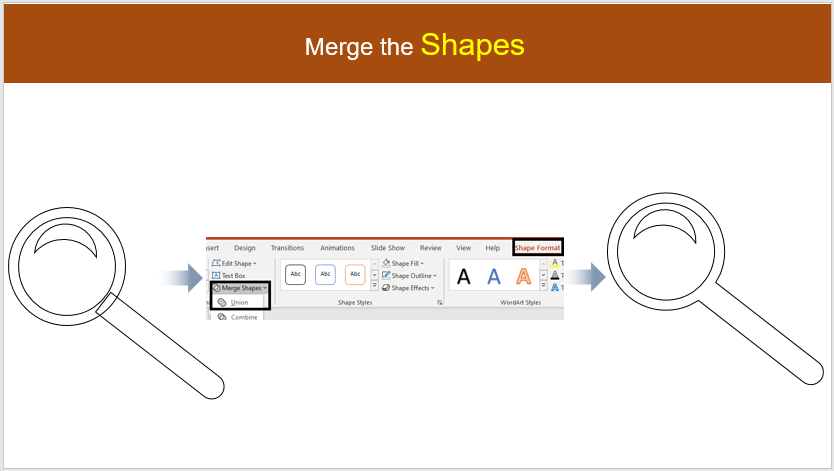
Download these Magnifying Glass Icon Templates:
Template #1
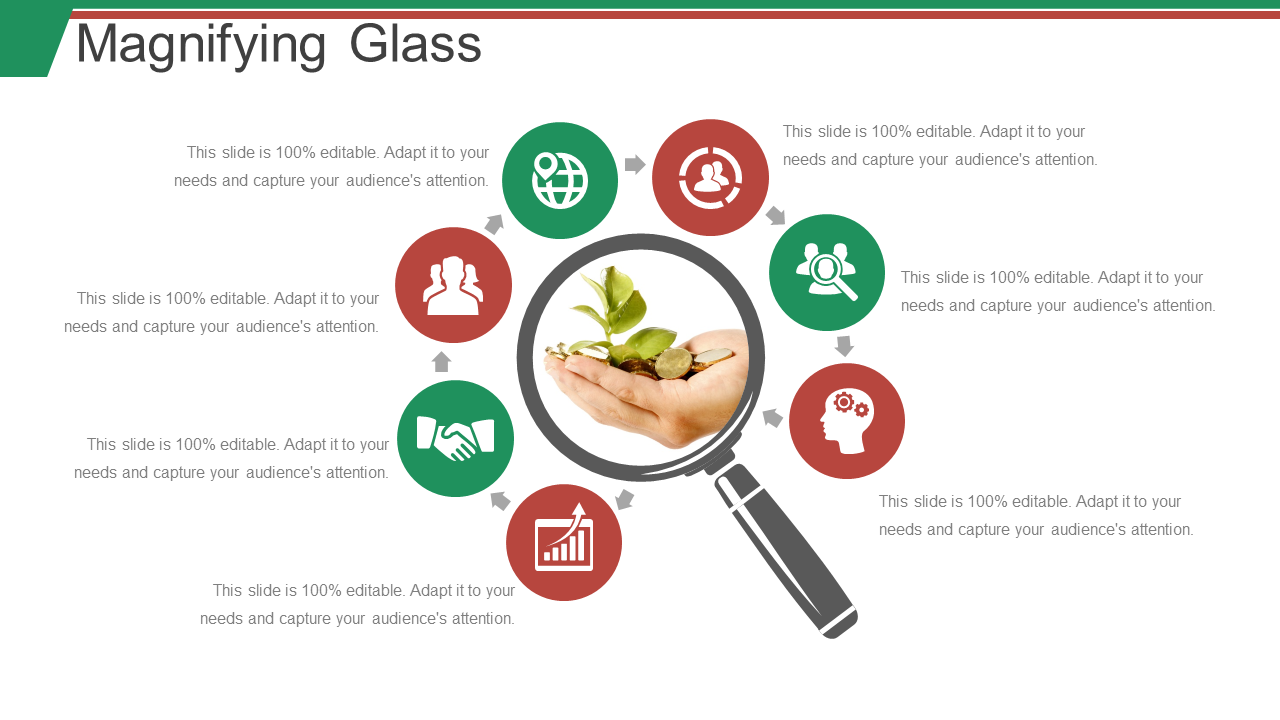
Grab this informative Magnifying Glass PPT PowerPoint Presentation Slides Portrait
Template #2
Feel free to download this Magnifying Glass PPT PowerPoint Presentation Layouts
Template #3
Get access to this Magnifying Glass PPT PowerPoint Presentation Inspiration Icons
Template #4
Grab this professionally designed Magnifying Glass PPT PowerPoint Presentation Information
Template #5
Click here to grab this creative Magnifying Glass PPT PowerPoint Presentation Styles Influencers
Template #6
Download this Magnifying Glass PPT PowerPoint Presentation File Grid
Template #7
Click here to own this Magnifying Glass PPT PowerPoint Presentation Portfolio
Download any of these magnifying glass icon templates as use them as per your need and requirement. Also, go through our other popular tutorials to learn more about PowerPoint and its uses.

 Home
Home 


 Customer Reviews

